
Stripe Payment Integration
Codepup AI makes it easy to add real payment processing to your website using Stripe. You can set it up right from the beginning when creating your project, or add it later at any time through the chat.
No manual coding required - Codepup AI handles the entire integration for you.
Video Walkthrough
Section titled “Video Walkthrough”Watch the full Stripe integration walkthrough to see the entire process in action:
What Gets Integrated?
Section titled “What Gets Integrated?”When you connect Stripe, Codepup AI automatically sets up:
- A payment service connected to your Stripe account
- Checkout UI components for your storefront
- Success and failure result pages after payment
- Webhook endpoints so your database updates when orders are placed
- Edge functions to securely process payments server-side
- Database migrations to store order and payment data
Two Ways to Integrate Stripe
Section titled “Two Ways to Integrate Stripe”There are two points where you can add Stripe to your project:
| Method | When to Use |
|---|---|
| At project creation | You know upfront you need payments - select E-Commerce at the start |
| After project is created | You already have a project and want to add payments via chat |
Method 1 - Set Up Stripe at Project Creation
Section titled “Method 1 - Set Up Stripe at Project Creation”Step 1 - Enter Your Prompt and Select E-Commerce Store
Section titled “Step 1 - Enter Your Prompt and Select E-Commerce Store”Go to the Codepup AI homepage and type your project idea in the prompt box. When the project type options appear, select E-Commerce Store (fullstack + payment + email integration).

This tells Codepup AI to build your project with Stripe payment integration and database support included from day one.
Step 2 - Enter Your API Keys
Section titled “Step 2 - Enter Your API Keys”Before building starts, Codepup AI will ask you to provide your Stripe Secret Key and optionally your Resend API key for email notifications.
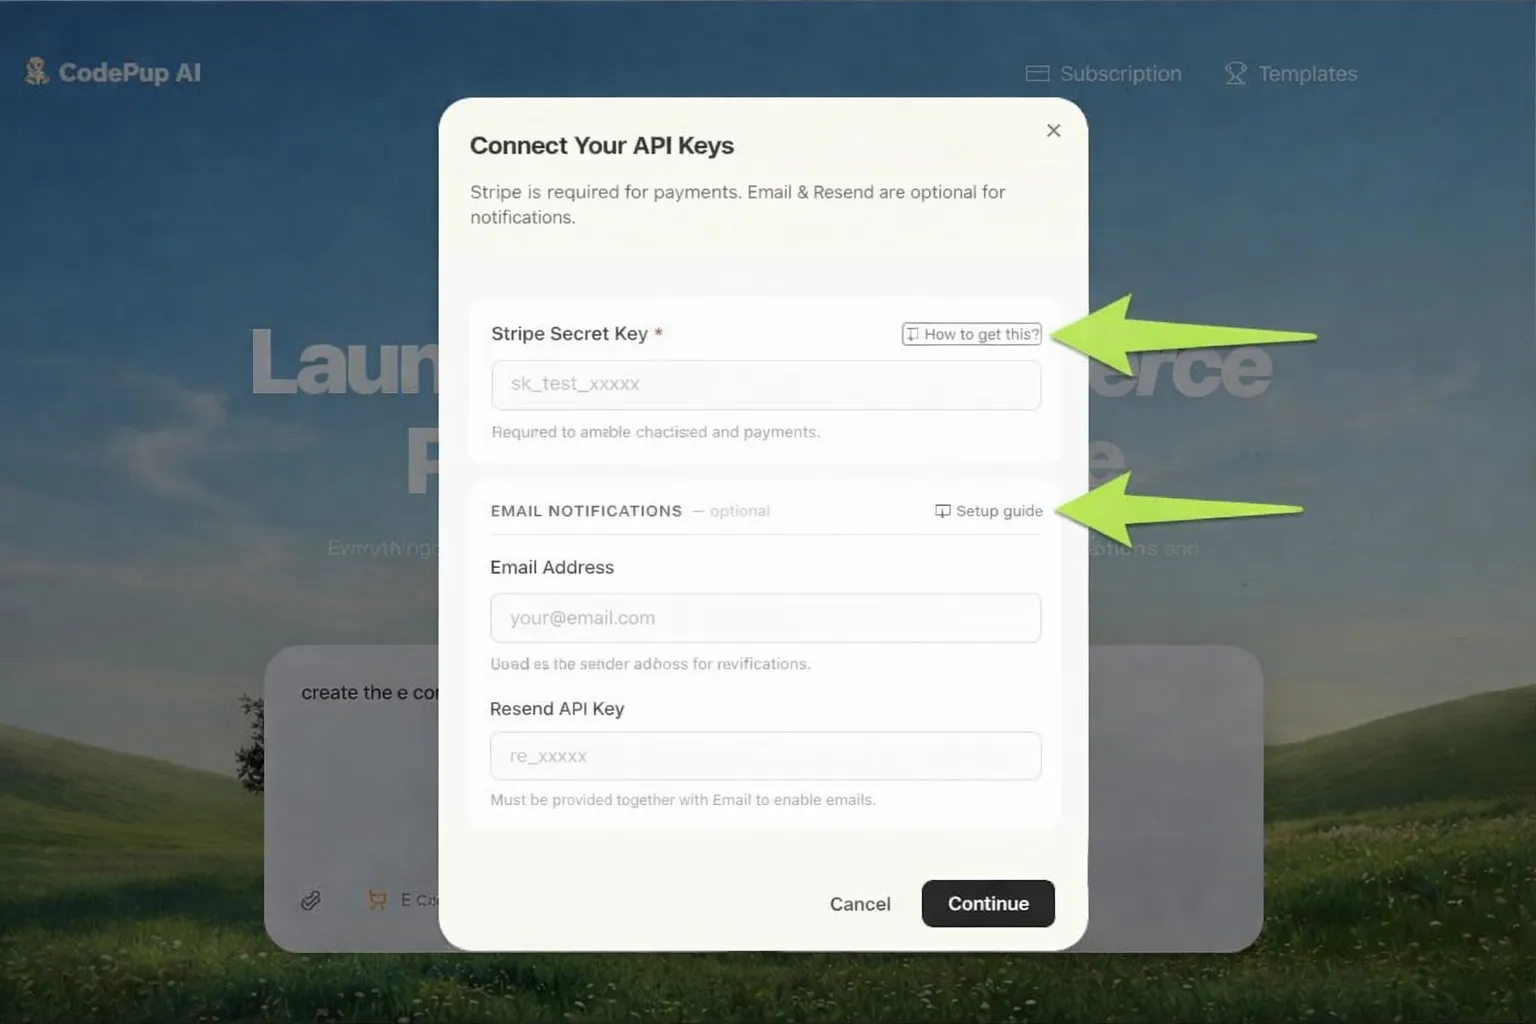
Fill in the fields:
| Field | Where to Get It |
|---|---|
| Stripe Secret Key | Your Stripe Dashboard → Developers → API Keys |
| Resend API Key | Your Resend Dashboard → API Keys |
Once entered, click Proceed and Codepup AI will start building your fully integrated e-commerce project.
Step 3 - Codepup AI Builds Everything Automatically
Section titled “Step 3 - Codepup AI Builds Everything Automatically”Codepup AI works through every task required to complete the payment integration one by one. You can watch the progress live in the chat.

Each task is checked off as it completes - including:
- Reading edge function templates
- Deploying session and webhook functions
- Analyzing project structure
- Creating and pushing database migrations
- Creating the payment service
- Building UI components and result pages
- Updating routes
- Uploading and building the project
- Creating the webhook endpoint
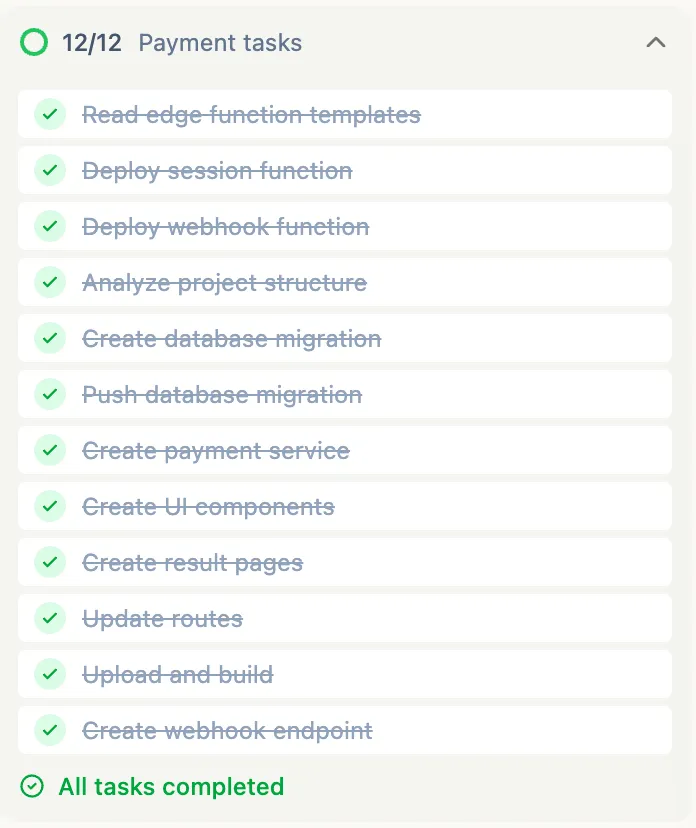
Once all tasks are done, you will see “All tasks completed” - your Stripe integration is live.
Method 2 - Add Stripe to an Existing Project
Section titled “Method 2 - Add Stripe to an Existing Project”Already have a project built and want to add payments? You can do it anytime from the chat section.
Step 1 - Ask Codepup AI to Integrate Stripe
Section titled “Step 1 - Ask Codepup AI to Integrate Stripe”In the chat section of your project, type a prompt like:
"now integrate the real payment gateway using stripe"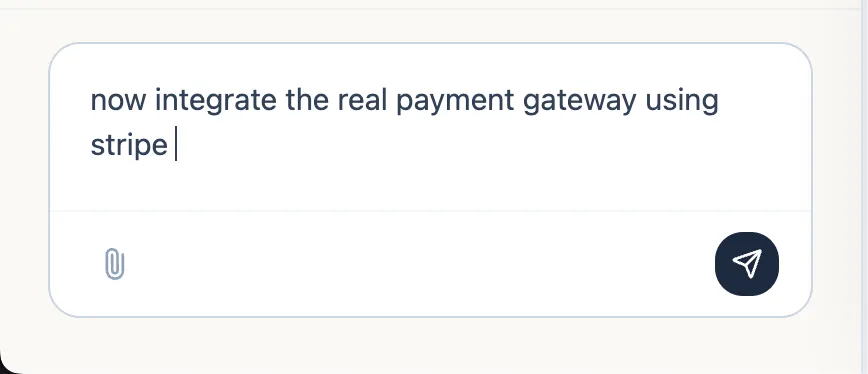
Codepup AI will immediately check your project structure and verify if Stripe API keys are already configured.
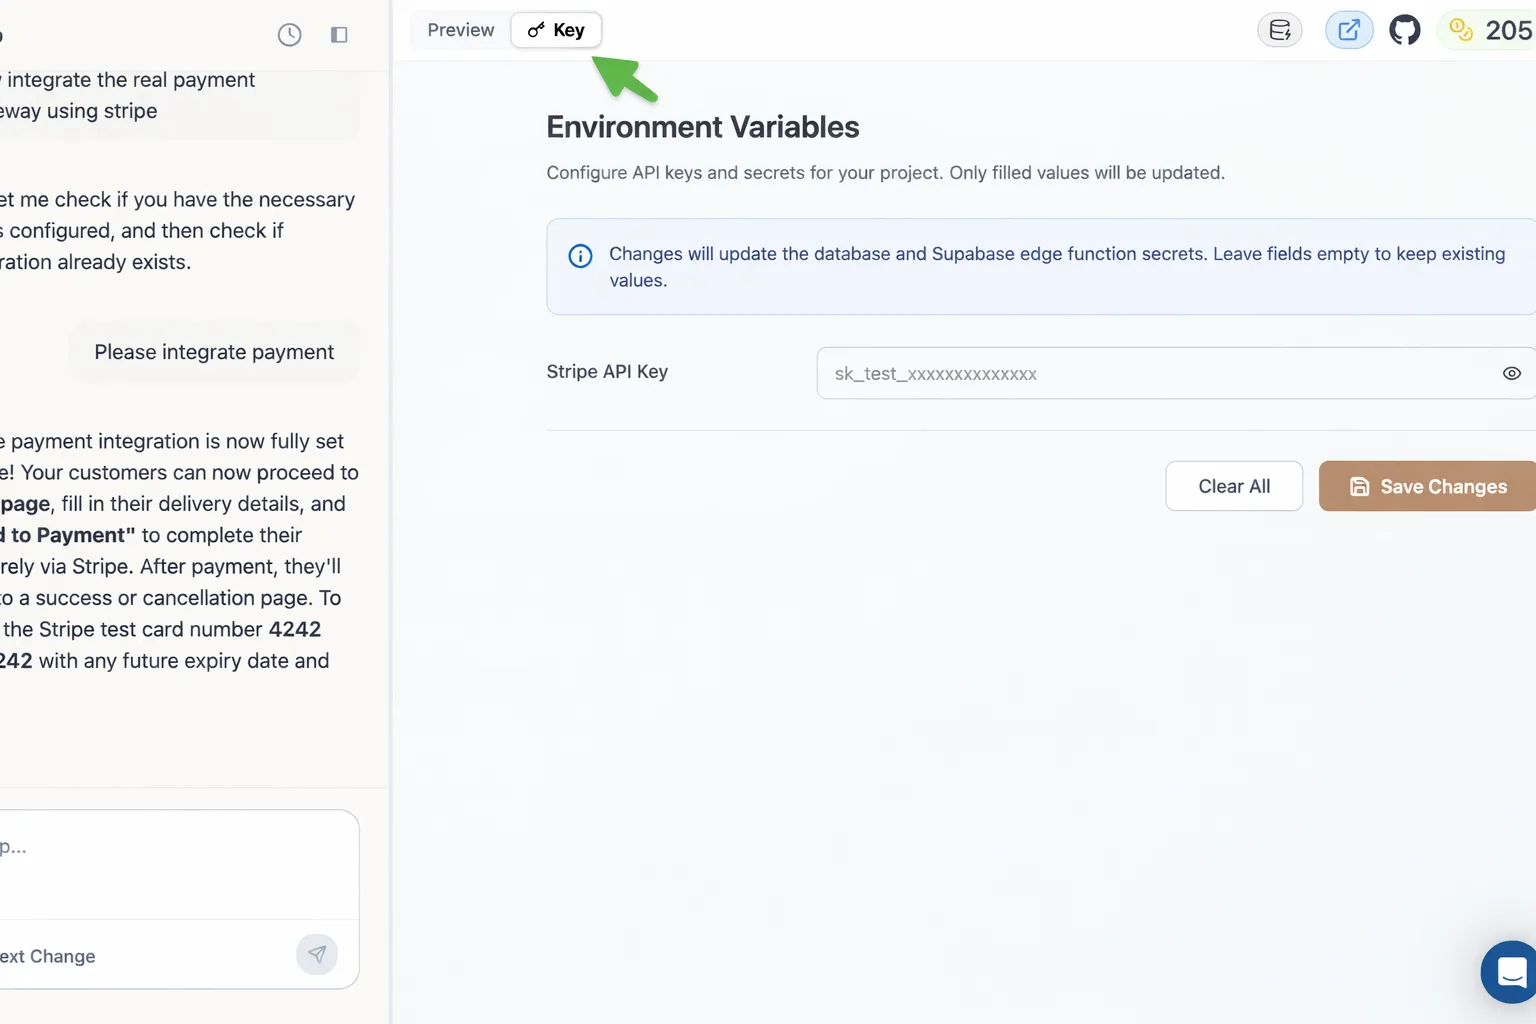
Step 2 - Enter Your Stripe Secret Key
Section titled “Step 2 - Enter Your Stripe Secret Key”Codepup AI will show an Integration Keys Required prompt asking for your Stripe Secret Key.
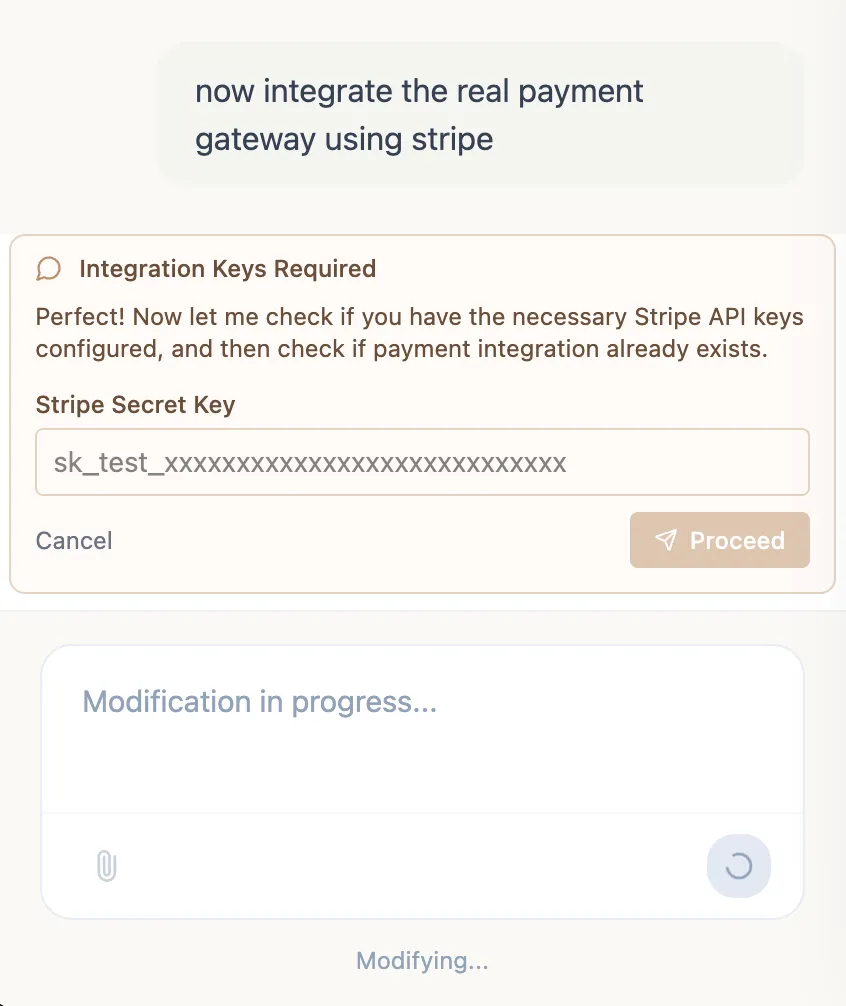
Enter your key in the format:
sk_test_xxxxxxxxxxxxxxxxxxxxxxxxxxClick Proceed - Codepup AI will begin modifying your project to add the full payment stack.
Step 3 - Codepup AI Modifies Your Project
Section titled “Step 3 - Codepup AI Modifies Your Project”Codepup AI runs through all the necessary modifications automatically - deploying functions, creating migrations, wiring up the payment service, and building checkout components.
You will see “Modification in progress…” in the chat while this runs.
Step 4 - Automated Testing
Section titled “Step 4 - Automated Testing”After integration is complete, Codepup AI runs automated testing on the payment flow to verify everything is working correctly end to end.
This checks that:
- The checkout flow works
- Stripe receives and processes payments
- Webhooks fire correctly
- Order data is saved to the database
Testing the Payment on Your Website
Section titled “Testing the Payment on Your Website”Once integration is complete, visit your published website to test the full checkout flow.
Step 1 - Go to Checkout
Section titled “Step 1 - Go to Checkout”Browse your store and click Proceed to Checkout on a product or cart page.

Step 2 - Complete the Checkout
Section titled “Step 2 - Complete the Checkout”Depending on how Codepup AI built your project, you may see one of two checkout experiences. Both are fully connected to Stripe and work correctly.
Type A - Shipping Address + Place Order
Section titled “Type A - Shipping Address + Place Order”Some projects generate a checkout page with a shipping address form and a Place Order button. The customer fills in their delivery details and confirms the order.
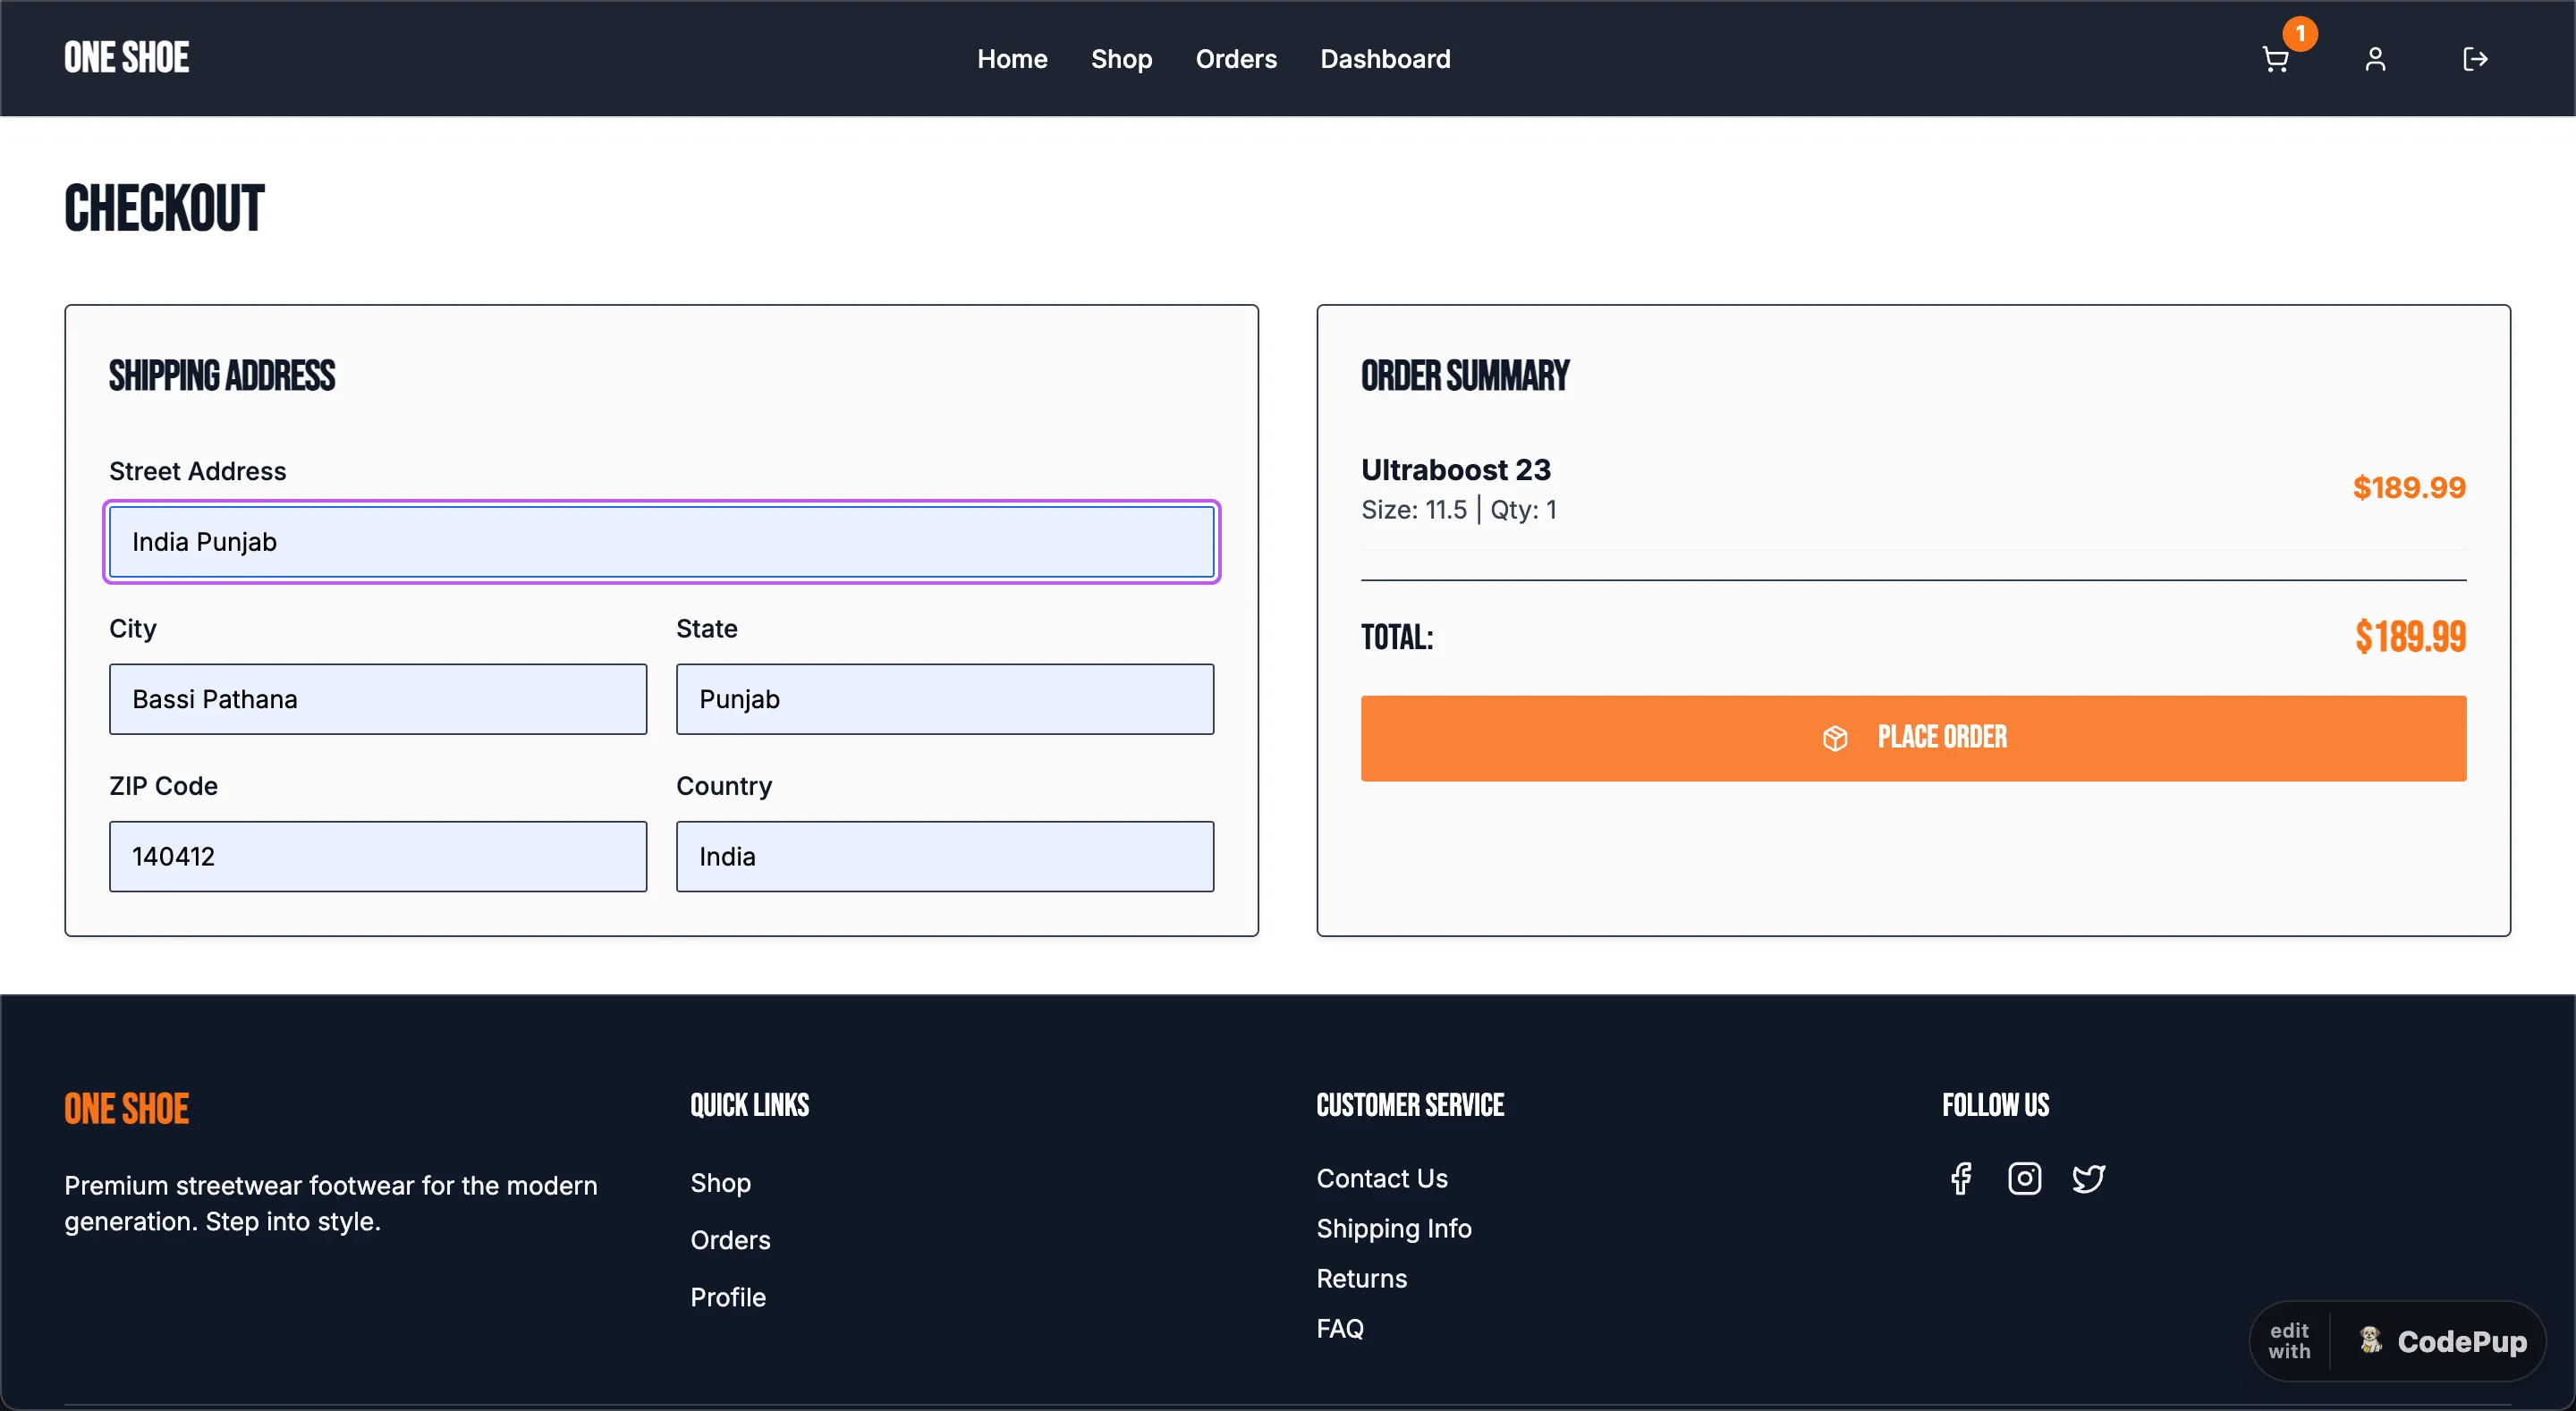
Fill in your shipping details and click Place Order to complete the test purchase.
Type B - Stripe Card Input Checkout
Section titled “Type B - Stripe Card Input Checkout”Other projects generate a checkout page with a Stripe card input form where the customer enters their credit card details directly before placing the order.
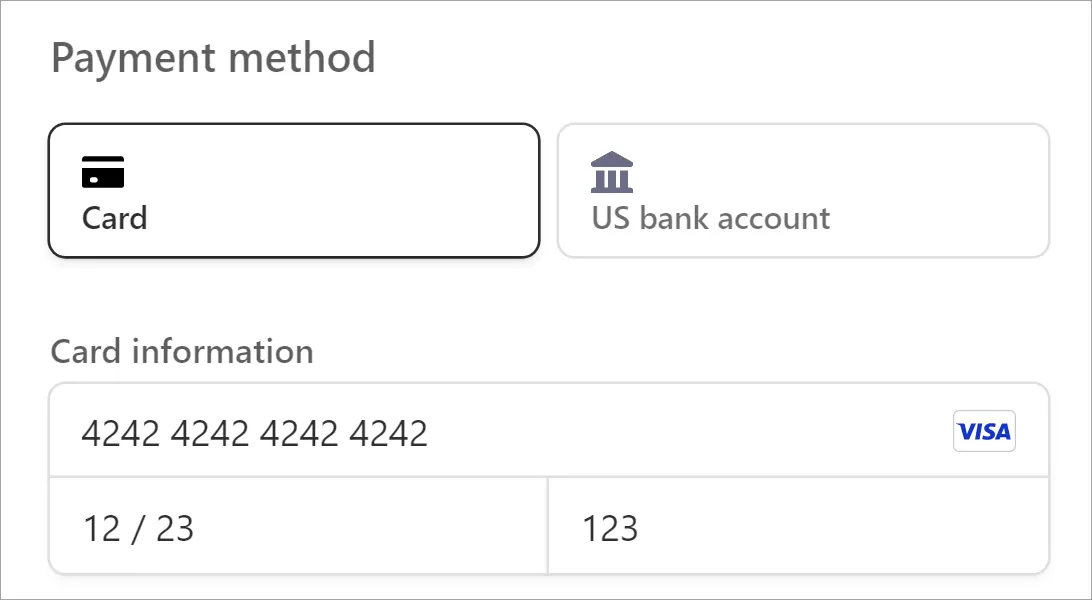
Use Stripe’s test card details to simulate a successful payment:
Test Card Number : 4242 4242 4242 4242
Expiry           : Any future date
CVC : Any 3 digitsA successful order confirms your entire payment flow is working - from checkout to database to your Stripe dashboard.
Switching from Test to Live Payments
Section titled “Switching from Test to Live Payments”When you are ready to accept real payments:
- Go to your Stripe Dashboard and activate your account
- Copy your Live Secret Key (
sk_live_...) - In Codepup AI, go to the Key section in Chat Page
- Replace your test key with the Live Secret Key
Manage Your Keys
Section titled “Manage Your Keys”Get paid, ship faster 🐶💳